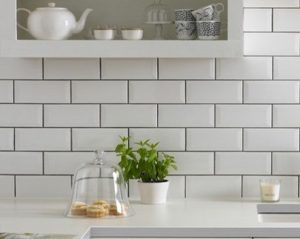
When you’ve got a tile project, it’s easy to get lost in all the tile materials, designs, dimensions and colors. But, we’re looking to shed a little more light on tile’s protective older brother: grout.
Tile installers force grout (in its soft state) into the spaces between tiles with a grout float. The excess is then wiped away with a sponge, leaving the canals or ‘joints’ filled to just below the surface. After the grout dries, the tiles are polished with a soft cloth to remove any “grout haze” left behind.
And although grout can come in a variety of colors (which we’ll talk about later), it’s not just there to look pretty. Proper grout installation first and foremost locks tiles in tight.
Of course, it’s all about the product. So, knowing the different types of grout means knowing which is best for your particular project. The choice of which grout to use depends, not on the tiles, but on the width of the little alleys or ‘joints’ between them. Narrow joints of 1/8 inch or less typically call for un-sanded grout, a smooth blend of cement and powdered dyes mixed with water. Joints wider than 1/8 inch get sanded grout, which is the same material, but with sand added. The sand helps to keep the grout from shrinking.
Aside from sanded and un-sanded grout, there are two general types of grout makeup: cement (regular) grout and epoxy grout. Let’s break these down:
Cement grout
Cement grout or regular grout, as you’d imagine, is made from a cementitious powder mix. Regular grout is very easy to shape in outside corners where tile wraps around a wall, curb or shower niche. It is harder to achieve the same effect with epoxy grout, since it takes a little longer to set up in the grout joint.
Epoxy Grout
Epoxy grout is made up of two parts, epoxy resin and hardener; and comes as sanded or un-sanded. Most importantly, epoxy grout is unaffected by most chemicals and stains. Applications such as backsplashes, floors, kitchen counters and heavy-traffic areas are where epoxy grout can do its best work, demonstrating its durability. And although its resistance is attractive, it can also be a bit too abrasive and discolor porous surfaces such as unglazed stone tiles or limestone. Having said that, be sure to have those flooring materials properly sealed before laying the epoxy grout. Although it’s a bit pricier and more difficult to apply, epoxy grout’s durability makes it a good choice for high-traffic areas.
Grout color
Here’s the fun part! Once you’ve understood which grout fits best with your project, there is a wide variety of grout colors to choose from. You can approach grout color in a few different ways: traditional/neutral, harmonizing, or contrasting.

Neutral/traditional grout is a subtle, complementary color to the tile; typically in whites, tans, or grays.

Harmonizing grout color blends with the tile color; green tile, green grout.

The very on trend contrasting grout color where it’s completely contrasting colors with the tile; white tile, dark gray grout.
Care and cleaning
Care for your grout just as you would your new tile; seal with a quality sealant, clean up spills right away and regularly clean the area. When we think of cleaning grout, we typically bust out the bleach and rubber gloves. But contrary to popular belief, bleach is not the route for clean grout. Besides leaving your home with a strong bleach smell, it will only disinfect your grout, not clean truly it.
For a successful grout cleaning, you’ll first need a powerful degreasing chemical. Try avoiding oil-based soap cleaners as they’ll only create more build up in your joints. Next, get out a stiff-bristle brush or steam cleaner and put your back into it. You can’t go wrong with the traditional hands-and-knees toothbrush approach. A mixture of vinegar and baking soda is also an easy cleaning solution.
The information above would work for most grout installed with machined ceramic and porcelain tile. Hand-made tile, natural stone and the grouts themselves may be harmed by the solution. Bleach might discolor and/or remove pigment over time.
So the next time you’re dealing with a tile project, you’ll have a lot more knowledge on all aspects of grout! And, if you still have some questions, give us a call and we’ll fill you in.

